Friday 20 April 2018

Safety Equipment


Personal Locator Beacon


ACR ResQLink+ PLB


The ACR ResQLink+ 406MHz GPS Buoyant PLB is a floating pocket sized, compact and light, GPS-enabled Personal Locator Beacon which will quickly and accurately relay my position in an emergency and will guide rescuers to within 100m or less of my location.  It has a one time use.
 
Whilst they will function anywhere around the world, the first authority to be contacted in an emergency situation would be the UK Coastguard Agency in Falmouth as it is pre-programmed with the UK country code.  It has to be registered with them as well.
 
When the beacon is activated it sends a 406 MHz signal to military search and rescue satellites orbiting the earth, with my GPS location and personal information that I provided when I registered the device.  A 121.5 MHz local homing signal is also emitted that allows rescuers to narrow down my specific location in the immediate area, and an in built strobe light starts flashing.
 
Battery storage life is 5 years and operating life is typically 30 hours at 20 degrees C.  The battery can be replaced at an authorised service centre, which includes full testing and diagnostics. The + version floats and is waterproof to 5m.  When activated the beacon emits 5+ Watts of transmit power so is more likely to reach satellites in bad weather. 
 
If I ever do need to use it and get rescued, I can share my story on their website and they'll send me a new PLB for free.  The 406 Survivor Club can be found here...https://www.acrartex.com/survivors/
 
Taking a PLB on my adventures is a no brainer...there's been plenty of times I've been in places with no phone signal in the UK.  Whether you adventure alone or with people, carrying one of these could be a life saver.


Bivvy Bag

 
Rab Survival Zone Bivvy Bag.
 
For hill and mountain trips I was looking for something lighter than my British Army Bivvy, and purchased the Rab Survival Zone.
 
Weighing 440g and made of 70d Hyperlite Storm fabric it fitted the bill, being half the weight of the army bivvy and packing down small to boot.  Primarily for emergencies, the idea is to get yourself or an injured party into it, injury permitting...using a sleeping bag/space blanket for warmth and awaiting rescue if conditions are poor.

Occasionally I do use it in conjunction with my micro tarp for alternative camp set-ups and I'll slip it over the bottom half of my quilt when using the Trailstar if I know the wind direction is going to change overnight, potentially blowing rain in through the doorway.  It can also give an extra degree or two on those extra chilly nights.

It is fully waterproof with a hydrostatic head of 10,000mm and all the seams taped on the inside, however I seam sealed the stitching on the outside as well for additional peace of mind.  I tested it by chucking some cushions inside then putting the bag in the bath to soak for a little while.  Upon retrieval all cushions were dry.
 
Condensation can be a problem with this bivvy though....the outside of my quilt always ends up getting damp after a night spent inside it.  Using it for the odd night here and there is fine...but I'd hate to imagine the state of my quilt if I used the bivvy five nights in a row.  If I wanted to do nothing but bivvy I'd take my army bivvy or do some research and buy something better.
 
As I've said though, this bivvy is primarily for emergency situations and with that in mind the bag is perfect; fully waterproof, light, compact and bright red for visibility.


Ice Axe and Crampons


Essential kit for snow and icy conditions. 

Camp Corsa.

The ice axe is used firstly as an anchor to prevent slipping down a slope by planting it in the snow every couple of steps.  If your feet slide out from under you,  quickly grabbing the axe at its base where it goes into the snow with your free hand can prevent a slide.
 
If you are unable to prevent a slide then the axe is then used for self arrest.  A good video showing the techniques can be found here...https://www.youtube.com/watch?v=94QFImjdEAo&t=258s
 

As I only needed an ice axe for basic safety, I chose the lightest on the market...the Camp Corsa.  Being 6ft 2" I got the long 70cm version.  Made of a 100% aluminium with a head that is hot forged to dramatically increase its strength and durability...the axe weighs only 240g.
 
 
Hillsound Trail Crampons.

Having traction on ice whilst hiking is imperative especially with a big pack at height.  I didn't want something too heavy with massive spikes so elected for the Hillsound Trail Crampons. 
 
With eleven 1.5cm spikes these provide great traction on ice....walking downhill on ice covered slabs...no problem.  They are very easy to put on and take off and feel secure on your boot whist walking.  Durability seems good...mine are still in good condition.
 
At 526g they are light enough to pack for any icy eventualities.  On the Pennine Way I used them a couple of times and was definitely glad I had them coming down Pen-y-Ghent.  I carry them in a crampon bag strapped to the outside of my rucksack.


Sun Protection

 
New Balance Accelerate Long Sleeve Shirt and the Outdoor Research Sun Runner Cap.
 
Blue sky days at height can burn if you don't cover up...as I found out last year in the Cairngorms.  Even the backs of my hands burned...so make sure to use sun cream on exposed areas.


Miscellaneous


Whistle - normally clipped onto the arm strap of my rucksack.  If in trouble 6 long blasts, wait a minute, repeat.  If I hear the whistle of someone else, respond with 3 blasts and start searching for them.

Signal Mirror - this mirror I got free from ACR when I bought their PLB.  It has instructions on the back on how to use and is normally part of my wash kit.

Hand Warmers - could prove handy!

Thermal Blanket - will retain up to 80% of the body's heat.

Strobe - strong signalling option.

First Aid Kit - dressings, bandage, sterile wipes, plasters, and paracetamol.


Wednesday 18 April 2018

Equipment


 Stove


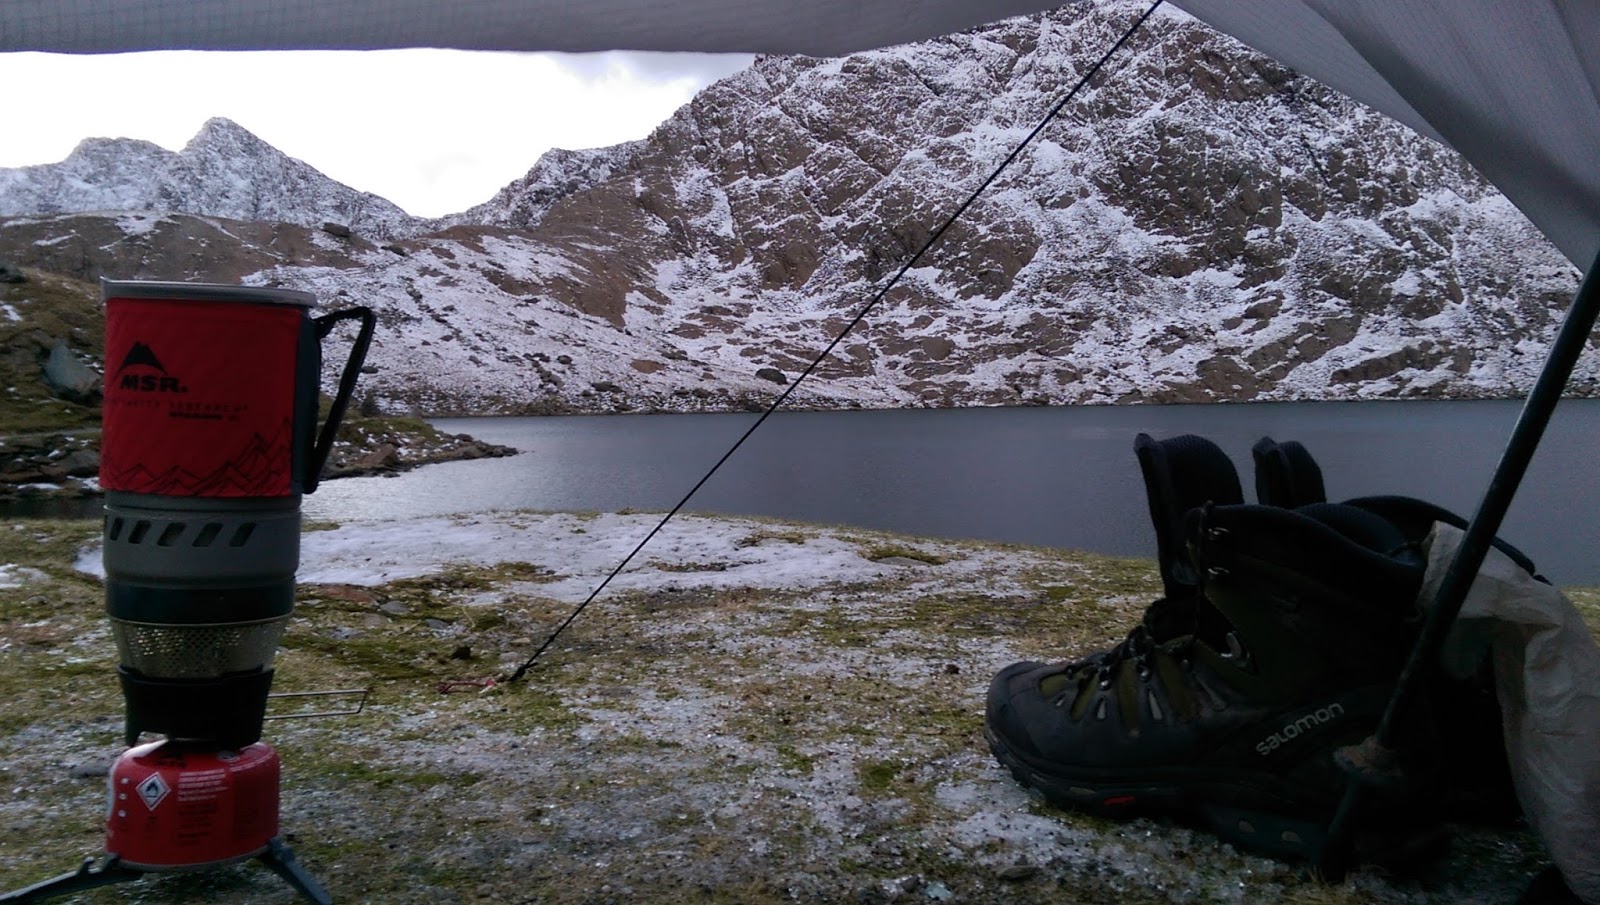
MSR Windburner.  Glaslyn, Snowdonia.

Before I got my MSR Windburner I was using a Trangia Triangle cook system with an MSR Titan Kettle.  The Trangia served me well on both my Dartmoor and Brecon Beacons adventures, and I still use it loads on my hammock camps in Kent, but when I first saw the Windburner I knew that I had to get one...and sure enough my wife bought me one for Christmas.

Built to operate in adverse weather conditions, this is cracking kit for hills and mountains.  Its radiant burner and enclosed, windproof design allow the stove to boil water fast.  The pot locks onto the burner with a small twist and has an integrated heat exchanger on the bottom which efficiently transfers heat into it so you can enjoy a quick meal or hot drink with little downtime. The all-in-one system nests inside its pot for easy packing and assembly. 

On my multi-day adventures I generally take freeze dried meals, so all I use it for really is to boil water.  For brews I'll chuck a t-bag in... give it a stir then add some powdered milk.  The Windburner comes with a plastic cup but I prefer to leave that at home and drink straight from the pot, afterwards giving it a clean with some tissue.

MSR are known for their superb quality and this stove is no exception.  It's never failed me in the 3+ years I've had it.  Massive thumbs up!


Water Filtration and Storage

 
Using the MSR Guardian to fill an MSR Drom Bag.  Blean Woods, Kent.

I bought the MSR Guardian because it was one of the first water treatment filters with a pore size of 0.02 microns in its hollow fiber filter, which meant it could eliminate viruses on top of protozoa and bacteria. 

Before this I was using a Sawyer Mini to filter, then using Aquamira water treatment drops to kill viruses... a tedious process that took too much time for my liking, along with the 15-30 minute wait for the Aquamira to do its thing.  Even filling the Sawyer bag itself from a source was a nightmare.  Whether squeezing water through the filter or hanging it upside down and letting gravity do the work...I just found the whole damn thing cumbersome.

So I took the plunge and got myself a Guardian.  Costing £300 at the time...it wasn't cheap...and weighing in at 22oz...it wasn't lightweight.  Oh..but every other thing about it was superb!

As already mentioned it takes out viruses.
It self cleans.
It can withstand being dropped and is able to freeze without damaging the filter.
Lasts for up to 10,000 litres.
Easy to pump.
But best of all what I love is its speed and ease of use.  Just whip it out...screw your Nalgene on...throw the intake in your source....and pump.  It can fill a litre in 42 seconds which is fast.  I keep mine in a small dry bag in the top of my rucksack so it doesn't get other stuff wet after use.

It just makes getting water so easy.  Another beast item from MSR.

Water storage.
For water storage I'll always take my 1L Nalgene bottle which i keep in the side pocket of my rucksack so it can be accessed without taking the pack off.  It's leashed to the pack as well because I lost my old Nalgene after a gust of wind blew me over sending the bottle rolling over a cliff. 

For additional storage on hiking trips I'll take my Platypus 2L water tank, and for more static outings my MSR 4L Dromedary Bag.


Headlamp


Black Diamond Icon.

Another essential piece of kit; a headlamp should always be packed even for day hikes.  You never know for sure what might happen while adventuring....target destinations may change as the day unfolds and pushing for a camp may over run into darkness.  In the hills and mountains there can be many variables...being able to see in the dark is critical...and of course you need a light for around camp.  I always take a back up light as well.

Yorkshire Wolds.
My choice 3 years ago was the Black Diamond Icon.  It ticked a lot of boxes...it was durable, waterproof, reasonably bright and had good battery life...the latter being most important.  It will last 8 hours on the highest setting of 320 lumens...time enough to get out of a pickle.  I always pack a spare set of 4 AA batteries too.

It's bulky and heavy compared to other head torches, but it's never bothered me...the straps do a good job of keeping it on the head and it is comfortable to wear.

It has 3 modes...high power spot, low power flood, and red light.  All modes offer variable dimming and the operation is all done through one button which can easily be used with gloves on.  The flood is great for around camp, the light being dispersed very evenly and the red light I use when not so much light is needed.  You can also power it off so it can't accidentally be switched on in your rucksack.

There is a new version of this lamp now which features a high setting of 500 lumens compared to my 320, higher IPX rating, green and blue night vision, and it will now remember the dimness level when switching on for the first time.  I might just have to upgrade in the near future and pass mine down to the son-in-law!  A superb headlamp...that's for sure...it's done the job when I really needed it.


Torch


Thrunite TN12.

This compact but bright Thrunite TN12 torch was only meant to act as a back-up torch, but has become a firm favourite.  It has 5 brightness settings, the highest being 1050 lumens, and a strobe.  Waterproof to 2m it takes a single rechargeable 18650 battery or 2 x CR123A's.  I use a 18650 and always pack a spare.

I've never had to use it as a back-up torch as of writing, but it has proved to be invaluable for night navigation in the hills on a couple of occasions.  This torch gives me the ability to see through the cloud further than my headlamp can when the weather closes in, allowing me to trail find better.  On one occasion in Snowdonia this proved to be critical, but thankfully this torch got me through. 

The strobe was used on one occasion too, signaling a coastguard helicopter to the location of an injured woman with a broken ankle on Cadair Idris.

So yeah....this is one item that will never get left at home...that's for sure.


Navigation Tools


Dartmoor
 My first multi-day adventure was on Dartmoor.  The first day was sunny but the next three days were awful and visibility poor.  I was moving tor to tor as the crow flies and quickly realised how essential a compass is and how often I should take readings.  Leave it too long and you can literally be heading in the opposite direction to your target.

I'd had my Silva Type 4/54 compass a good few months now, another Christmas gift from my wife, but I had yet to make use of it.  As soon as the mists on Dartmoor rolled in though...it was time to put it through its paces.

Slapping the direction of travel on the map then aligning the dial to grid north and adding 2 degrees for declination gave me the bearing I needed.  Then it was just a case of taking regular readings by aligning the red arrows to give direction of travel, or for more precision I could look through the little window on the dial to find my bearing.  I preferred this second method as once the bearing is aligned you can just switch your focus to a place in the landscape that's on said bearing, just by looking above the window.  I then walked to the point and took another reading....simple and accurate.


For maps I use Ordnance Survey 1:25000 Explorer maps on my ViewRanger app.  I love having these maps on my phone...I shelled out £250 for the whole of Great Britain and I've never regretted it.  It's so much easier to use than an actual paper map and the ability to pinpoint locate yourself with GPS is very handy.


ViewRanger.

However...I always take a paper map of the area as backup as it's never a good idea to be solely reliant on a phone.  A paper map is best for looking at a wider area too as only so much of a map can be viewable at one time on a small screen.


Power


I use my Samsung Galaxy S7 for video, photos, mapping, GPS, music and social media when out on adventures so I need external batteries to keep it going. 

I started out with an Anker 2nd Gen Astro 3 12800mAh external battery.  This almost kept my old HTC One M8 phone going for 5 days, but I decided to supplement it with a solar panel...so I bought the Instapark Mercury 10.


External battery and solar panel.
 
Farming solar on Dartmoor.
The panel can charge well; I remember it charging a fair chunk of my phone during a 30 minute rest stop under blue skies in the Lake District once.  What I like about it is its charge interruption recovery...how it resumes charging when it starts to get enough sun again.  Hook up an external battery in the integrated charging pocket and you can hang this from your backpack/shelter, farming solar as you hike/camp.

With the great British weather though, being reliant on the sun may not be a great idea.  During my Lake District trip I ran out of juice on Helvellyn on the last day.  Three days in a row of inclement weather had prevented me from using my panel...so I decided to ditch it from my 5 day adventures in favour of a second external battery...this time an Anker PowerCore 13000mAh.  With the two external batteries my Galaxy S7 will last 5 days no problem, even with all the filming I now do with it.

I did take the panel with me on the Pennine Way, but it was never needed.  I was able to recharge my external batteries at hotels when I wasn't wildcamping.  It is great kit though...a must have for extended adventure away from civilisation and it saved my bacon once too...

After coming down off Helvellyn with a dead phone I made my way back to Coniston and the car.  For the life of me I couldn't remember where I parked it.  After an hour of trying to find it the sun came out, so I charged my phone with the panel and was able to use my sat nav to locate the car.


Micro Tarp


The Micro Tarp from backpackinglight.co.uk is a good piece of versatile kit to carry.  It gives alternative options for camp rather than having to break out your main shelter, or can be rigged as a door or windbreak to your main shelter.  It also makes for a handy escape from the rain during a break if conditions aren't too bad.

One time I used it to protect my sleeping bag from the rain when it was being used to keep an injured hill walker warm.


Knoydart.
 
Dartmoor.  Here used as a windbreak to my DD Superlight tarp.
 
West Wales.  Makes a great accompaniment to bivvying.
 
Win Hill, Peak District.


Hiking Poles


Dartmoor
Both my poles have always been integral to the set-up of my shelters.  I started out using a DD Superlight Tarp then progressed to a Six Moon Designs Deschutes, before finally settling with a Trailstar...all needing hiking poles to erect.

As I already mentioned in my Shelter System blog I use Black Diamond Alpine Carbon Cork poles and can attest to the reliable, durable, and easy to use FlickLock locking mechanism the company employs, which in turn allows me to put good tension into my shelters to combat strong winds.

Due to their thicker than average carbon fibre construction, the Carbon Corks are much lighter than an aluminum pole, and although not as strong, definitely comparable.  These have coped with some serious load at times, most notably when I've started to fall over and a pole ends up taking much of my weight and that of the pack. 

On the flat I mainly use the poles just for stability on rugged terrain...on gradients though...they come into their own.  Even on slight ascents...poles help a lot.  Many a time I've stopped using the poles momentarily just to see the difference...and the difference is significant. 

Descending can be harsh on the knees too; I'm prone to getting sore knees on any significant descent so having the poles to "cushion" the battering they take is a godsend.  I honestly don't know if I would have made it back down Ben Nevis without walking poles. 

And then we have their other great use....testing the ground for firmness.  A quick stab of the pole into the ground can tell me whether it's going to hold my weight or not, and prevent my boots from getting wet...invaluable.

I have come to view my hiking poles as the unsung heroes of my adventures...they always help me while I hike...and then they hold up my shelter while I camp.  Legendary kit!


Backpack


Arc'teryx Altra 75.
Moving onto my backpack, I use the Arc'teryx Altra 75, regular/tall size.

This is a cross between the regular and tall versions with a back length range of 48 - 56.75 cm and an extendable collar with draw cord to match the 78L capacity of the tall version.  This feature is great as the pack will be stuffed to the brim at the start of an adventure utilising the extendable collar, then as supplies get used the "lid" will sit lower on the bag and the collar becomes redundant.  With my current equipment 78L suits me fine...I would not want to go any lower.

The primary reason I bought this pack was for its comfort and suspension.  My memories of the pack I used to walk the Pembrokeshire Coast Path all those years ago are painful.  I can't remember what brand it was, but it was certainly a shoulder killer.  The key to the Altra's carrying comfort is the C2 back system, a low profile suspension sheet that keeps the centre of gravity close to your back and transfers the weight efficiently onto the padded hip belt via a load transfer disc.  This pivots as you walk allowing unrestricted movement and ultra efficient load transfer.  The bags pear shape design also keeps the pack load low and close to your back minimising load movement and backward pull.  The bag also features a Gridlock system that allows you to completely remove and independently adjust the straps horizontally and vertically to get a completely customised fit.

And it works great...with this bag I can hump 50 lbs+ around no problem in comfort.  It does a superb job of transferring the load to the hip belt which annoyingly does need tightening on a regular basis as it will loosen over time.  However, with some heavy duty stick on Velcro and a few stitches this problem was eliminated.  Shoulder pain just doesn't happen with this pack.

The bottom flap is always used to secure my Z-Lite mat and crampon bag if needed.  The kangaroo pouch on the front stores my bivvy bag, micro tarp, shelter, tent pegs and groundsheet.  The right hip pocket has my Nalgene and the left has my waterproof trousers and gloves.  These Wingman hip pockets are angled perfectly to allow easy access whilst carrying the pack.

The lid is designed well with two top loading compartments for easy access, and can be detached completely from the bag.  In one I carry my water purifier, water storage bag and spare gas, and in the other my emergency beacon, headlamp, torch, space blanket, and small bag containing all my small stuff and first aid.

Peak District.
The main compartment stows, in order from bottom to top, my sleeping bag, sleeping pad, wash-kit, external batteries, campwear, food + stove, hikewear, and waterproof hardshell.  If I ever need to get to any of these quickly there is a u-shape zipper that runs around the sides and bottom of the compartment, that saves having to take the lid off and unpack stuff.

Anything that needs it has its own dry bag to protect it from moisture and to make packing more organised.  The pack is only water resistant so anything more than a shower is going to result in water ingress.  To prevent this I carry the large pack cover from Arc'teryx which is normally clipped to the outside of my pack when not in use.  Its generous size means it can wrap around the attached Z-Lite mat and the straps secure it in place against the wind...good design.

After 3 years of use nothing has broken on this pack and the only wear has been on the hip belt where the bottom of the shoulder straps rub against the material...which is nothing major.  I do hope to go more lightweight in the future...but until then this pack is going to continue being my load carrying workhorse.


Miscellaneous


From left to right:

Lightweight Tripod - now battered and broken...this cheapskate tripod from Amazon was at least ultra-light if nothing else!

Small PackTowl - very absorbent and virtually dry again after wringing...I find this useful for mopping condensation off the inside of the Trailstar or drying kit.

Radio - didn't take it on the Pennine Way but usually do on my 5 day adventures.  Mine's a Roberts Sports 925.

Overboard Waterproof Phone Case - awesome piece of kit...one of my most important!  Keeps my phone protected in awful conditions and the touchscreen is still very responsive through the clear plastic. 

Spare USB Lead.

Tenacious Tape - for tarp repair.

Rubbish Bags.

Spare Lighters.

Spare Batteries - for headlamp and torch.

Swiss Army Knife.

Main Lighter - this is one of those plasma lighters which is electrically charged.  I have to say it did really well, never failing me and lasted the whole of the Pennine Way on one charge.

Therm-a Rest Inflatable Pad Repair Kit.

Basic First Aid Kit.

Wash Kit - containing antibacterial hand wipes, facial wipes, tissues, moisturising cream, deodorant, mirror, badger foot balm, toothbrush, toothpaste, chap stick and cotton buds.

Glasses Case - when my specs get covered by rain droplets I see better by not wearing them, hence I need a safe place to store them.


And that ends this blog....next one will cover the safety equipment I pack.


Sunday 8 April 2018

Sleep System


Here's my sleep setup for hill and mountain trips.

In a bothy here, so no groundsheet needed.
 

Pillow


No proper pillow...just a dry sack with clothes inside. 


Ground Sheet


I use a Rab Element Solo Ground Cloth which is designed to be used with the Rab Element Solo Tarp Shelter System.  I bought this because its dimensions provided a generous footprint for my sleeping pads. 

The water-resistant 40D coated nylon material is strong and durable.  I've had mine a few years now...and not a hole to be seen.  It provides great protection from wet ground and things that might puncture my pad.  Weighing in at 180g and packing down to nothing...this is flawless simple kit.

I still ponder whether to buy a bathtub style groundsheet, but I've never had a problem with ground water coming into my shelter due to good site selection.


Closed-cell Foam Pad


The reason I take one of these in addition to an inflatable pad is simple.  If the inflatable gets punctured then I at least have something to insulate me from the ground, which could be critical.

I carry a Therm-a-Rest Z-Lite Sol, strapped onto the outside of my pack, and it makes for a great sit mat as well during breaks.  The concertina folding style is excellent for quick deployment and packing.

With an R-Value of 2.6 it contributes well to winter camping and also provides another layer of protection for the inflatable pad. 


Inflatable Pad


While not giving total comfort, the amount my Therm-a-Rest NeoAir Xtherm does give is enough for me to sustain multi-day adventure.  I've tried sleeping on just foam and it's miserable.  Over time I have learnt to sleep better on this pad by alternating sleeping on my right side and then on my back.  After long periods of slumber my muscles will start to ache from being in the same position.  It's not the best...but it suffices.

This pad has been and still is the best pad out there for a few years now.  It delivers the best warmth-to-weight ratio of any air mattress with an R-Value of 5.7 and my long version weighs just 570g.  Combine the value of my closed-cell pad and I sleep on a R-Value of 8.3 which is damn toasty.

It can be a little tedious to pack away but it's a must have item for ground camping.  Mine's still going strong after 3 years which does surprise me...not one puncture.  I think the ground sheet and foam mat does help prevent one from happening but still...I am impressed.  If mine died tomorrow I'd just order a new one.


Sleeping Bag


My sleeping bag, or quilt I should say, is the Revelation X quilt by Enlightened Equipment.  No longer manufactured, it was discontinued in 2014, when the original Revelation quilt was redesigned.  The X model was cheaper in price than the original and used cosmetic seconds outer fabric which was slightly heavier.

I got the long/wide 0 degree version with a 5% overstuff if I remember correctly.  The constriction of  my old mummy bag had been annoying me, so this wide quilt at a good price was a no brainer.  Filled with 850 fill power goose down, the bag compacts down to a reasonable size.

The quilt can be used like a standard sleeping bag or you can attach it to your pad with the straps.  Both work just as good....in warm weather you can even open it right out to form a blanket.  The top of the quilt clips together around your neck and can then be cinched closed to stop warm air escaping.  Simple effective design that works a treat.  As with most quilts it doesn't have a hood...I use my clothing hoods to insulate my head instead.

The quilt has always kept me warm on my adventures and I try to keep it as dry as possible by using a more heavy duty dry bag for it.  Most of the time I don't use a bivvy bag but always carry one for emergencies.  Sometimes I will actually use it for really bad/cold weather, or when I know there is going to be a change in wind direction overnight potentially blowing rain through the entrance of my trailstar.  Normally my shelter is all the protection my quilt needs.

My Revelation X has been going strong for over 3 years now and it has served me well. 


Thursday 5 April 2018

Campwear


After I set up camp the first thing I do is change into campwear.  Sometimes I do get lazy, in that I will keep my hiking t-shirt and light fleece on and leave my campwear base layer in the dry sack, but most of the time I will change out completely.  Here's what I wear around camp...


Morning brew in Peak District.


Long johns, base layer and socks.


Long Johns


Patagonia Capilene 3 Midweight Bottoms.  Great fit...very comfortable.  Made of Polartec Powder Dry polyester double knit, with Polygiene permanent odour control.


Base Layer


I originally bought this Ibex Hooded Indie to be a winter hiking base layer, but found that my t-shirt/lightweight fleece combo made it redundant.  Now I use it as part of my campwear...something clean, warm, and comfortable next to the skin after the days exertions.  Made of 100% soft and durable Merino wool it suits the purpose well, and the hood helps to keep my head warm too.


Socks


Nothing fancy here...just a thick pair of Heat Holders thermal socks my step-daughter bought me for xmas.


Down jacket, insulated trousers and booties.

Down Jacket


Mountain Hardware's Ghost Whisperer Hooded Down Jacket.  One of lightest down jackets around on the market, and with a superb warmth-to-weight ratio, there is no reason to ever not pack this.

Normally on my adventures I'd take my Patagonia R3 midweight fleece and wear it under this, but to save some weight on the Pennine Way I elected to utilise my hikewear insulated jacket on those colder nights around camp...slinging it on over the Ghost Whisperer.

I can't really knock the jacket; a hood cinch would have been nice to stop the wind blowing the hood down, but I guess they just wanted to make it as light as possible.  The outer ripstop nylon provides good wind resistance and the jacket feels very comfortable. 

The sleek design means this can easily be layered over... and the roomy cut leaves ample room for layers underneath.

Awesome camp item.


Insulated Trousers


Here I use the Montane Prism Pants as a second leg layer over my long johns.  The Pertex outer layer is windproof and the 40g Primaloft Eco insulation is warm and packable.  Normally on cold nights I will go to sleep with these on, but normally wriggle them off once the sleeping bag has warmed up.

I bought a size large and find the waistband elastic a smidge tight, (my waist being 34/35 inch).  I'll no doubt pick up an XL in the future, but it ain't a priority.

They do a good job of keeping my legs warm around camp.


Insulated Booties


Montane Prism again.  These booties are stuffed with their Primaloft Gold insulation with the same Pertex windproof outer as the pants.  The sole is made of tough Hypalon for increased durability for use around camp, but I prefer to keep them clean by just wearing them inside my shelter.  When I need to go outside I just slip on my boots with the laces inside.

Before I got my Lowa Tibet GTX boots whenever I stopped to make camp my feet would start to get pretty cold not warming up until I was established in my sleeping bag.  This prompted me to buy these booties.  Combined with the thick socks my feet are now well protected from the cold whilst in camp.  With the Lowa boots though...my feet don't even get cold anymore when I stop hiking. Win win.


In addition, I wear my light hikewear gloves around camp to keep my hands warm.  With the wind-chill blocked by the shelter I've never needed anything more.  For my head I just use the hoods that my base layer and down jacket provide...I don't bother with hats.


Wednesday 4 April 2018

Hikewear


The clothing I take to wear whilst hiking has become pretty standard now...hasn't really changed over the past two years.  Nothing has worn out or been damaged yet, apart from a pair of over-trousers which got ripped apart on rocks during a night hike on Kirk Fell.  Generally I use the outdoorgearlab.com website as a buying guide for my purchases.


Underpants


First off let's talk underpants.  I started out wearing my usual Patagonia Capilene Briefs on the Pennine Way.  I'd never had any problems before...but this time I had pretty bad chafing of the inner thighs after a few days walking.  The Y-front style of the briefs was ditched in favour of some ordinary cotton boxers I had as a spare.  These covered more of the inner thigh, reducing chafe.  For future adventures I will be switching out the briefs for Patagonia Capilene Daily Boxers.


Trousers, T-shirts, and Lightweight Fleece.

Trousers


For trousers I love the comfort of my Prana Zion Stretch Pants.  With trousers I always buy a size up in waist, as I like to feel free in any position without tightness/restriction.  The Zions' slimline in-built belt takes up the slack and does an okish job of not slipping....but does occasionally have to be re-tightened.  Leg wise I also get a size up to use trouser twists more effectively when not wearing gaiters.  Ticks are nasty!

The trousers are quick to dry off after getting wet and I love the side zip on the cargo pocket that allows me to access it easily when sitting down. 

The comfort of these trousers in all positions is just superb...it's easy to see why rock climbers love them so much.


T-Shirt


My choice here is the New Balance Ice Short Sleeve.  I have two and normally take them both in case one gets wet.  I find them comfortable and supremely breathable, as well as being very light.  Additional benefits are sun protection and anti-microbial treatment to control odour.


Lightweight Fleece


The Patagonia R1 Hoody.  I knew this piece was a classic, but hadn't been able to fully appreciate it until the Pennine Way made it clear.  Of all the gear I took....this was the winner.

More specifically its balance of warmth and breathability, which made its comfort range impressively large.  I only had to take it off once during the whole walk...setting out from Malham when temperatures were briefly milder. 

The half zip was great for venting and I never seemed to overheat on climbs, whilst the hood was awesome for finer temperature regulation...a little cold - put the hood up....a little warm - put the hood down.

During my ascent of Great Shunner Fell in the coldest wind chill I'd ever experienced...I kept thinking ,"...gonna have to put my insulated jacket on soon", but I never had to.  The R1 kept me warm enough combined with the heat generated from climbing. 

This was all of course with a windshirt or shell on top of it.  I highly recommend!


Windshirt and Insulated Jacket.

Windshirt


There are now better windshirts out there than my Arc'teryx Squamish Hoody for wind resistance.  For breathability though, it excels.  If it ain't raining then most of the time I'll be wearing this.  Its comfortable and weighs nothing.

I wore it over my Patagonia R1 going up Great Shunner Fell as mentioned above, and found its wind resistance properties to be sufficient.


Insulated Jacket


Here I use a synthetic product rather than down as it retains some thermal properties when wet.  It's damn rare that I have to actually wear it when hiking....generally it gets more use on food and summit breaks....and I'll wear it whilst setting up/taking down camp too.  Sometimes though...using Great Shunner Fell as an example yet again...it was needed.  Once I got to the top I threw it on and it stayed on for most of the way down, as I wasn't producing the body heat I was when ascending.

I use the Rab Xenon X, which has had great reviews for many years now.  Somehow I managed to get an ember hole through the shoulder of it.....tut tut.  I like the look and feel of it, and use it as my normal out and about coat.


Waterproof Shell and Over-trousers.

Waterproof Shell


Initially I bought an Arc'teryx Alpha FL shell but became interested in the new Columbia jackets that didn't need a DWR coating to repel water.  The lure of not having to worry about reproofing or the DWR failing mid adventure was just too great a temptation to resist, so I got the Diamond version of their OutDry Extreme shells and passed on the Alpha FL to my son-in-law.

On first inspection the material doesn't look that breathable but over the couple of years I've had it, I've had no problems with overheating clambering up mountains.  The pit zips are sizeable and most of the time I have them open.  The wrists have good Velcro fasteners and the shoulder area is reinforced against wear from pack straps.

The hood adjustment to cinch the hood tighter takes a bit of finesse and I find I am unable to do it with a gloved hand.  Also I feel the cut around the lower face could be higher to give more protection...the zipper only comes up to the chin.  The raised bling motifs on the jacket I find garish too.

Overall though it does the job and I'm happy with it.  This material is waterproof in itself and will never wet out.


Waterproof Over-trousers


The Berghaus Paclite over-trousers are very easy to get on and off thanks to their 3/4 leg zippers.  Having dual zippers on each leg means you can also vent them.

The Gore-Tex Paclite material is really lightweight and the trousers compact down well.  I did ruin a pair falling heavily on my ass on a scree slope, but that was to be expected.  I just bought another pair as they do a good job.


Ski goggles, gloves and buff.

Ski Goggles


I didn't realise just how important it is to carry a pair of these until my Knoydart adventure.  Faced with horizontal rain and strong winds blowing straight into my face I had to retreat to a bothy.  Ever since I always pack them no matter what season.

My pair of Bolle Y6 OTG goggles are nothing special, but they do the job.  Essential kit.


Buff


Standard buff by Buff.  Made of Merino wool this protects my lower face from freezing up in bad wind-chill, and also takes the sting out of horizontal rain/hail/sleet. 


Liner Gloves


These Rab PrimaLoft gloves are a lightweight Merino wool blend with conductive fingertips for use with touchscreens, which works very well.  I wear them when my hands get a bit chilly but only in dry conditions...as I like to keep these dry for camp use.  If need be I can wear them as liners under my normal gloves but I've never had to so far.

I have found these to be durable, after having bought similar from other brands that didn't last long.


Gloves


Gloves, gloves, gloves.  One quickly learns how essential they are and how much up shit creek one could be without them.  I've only been taking one pair on adventures so far, but I should be taking two to be honest in case a glove gets blown away.

I use SealSkinz Scafell XP Gloves and I find the warmth to dexterity balance to be superb...being able to set up/take down camp with them on is great.  The only thing I am unable to do is adjust my shell hood. 

The thumb and index fingers are supposed to allow use of touchscreen devices, but I find I have to take the glove off every time I want to use my phone.   In bad conditions my hand gets wet then goes back into the glove making it slightly damp.  Do this enough times and I end up with a wet glove inside and out.  The gloves are waterproof though as my other hand that holds the phone always remains dry.

I am happy with them overall...but would love a pair with more reliable touchscreen responsiveness.


So there we have it....next blog will be about my campwear.

Monday 2 April 2018

Footwear


For serious terrain, I personally prefer serious footwear.  I've had my Lowa Tibet GTX boots for about 2 years now and they've impressed me.  Weighing in at 1.1kg (2Ib7oz) per boot...they ain't light that's for sure.  I got mine one size bigger than my normal shoe size to allow for foot expansion.


I like the fact that you can lock off the tightness in the lower laces, as I prefer a loose fit on my foot with a firm tightness on the upper laces around my ankle.  There is also a wrap-a-round for the laces on the upper tongue to keep it in place.

Inside I traded out the stock insole for some Superfeet Greens.


Sock wise I took two pairs of Smartwool PhD Outdoor Medium Crew socks, swapping over when one pair got damp.  Underneath these I wore silk liner socks to prevent blisters.  With hind-sight I should have taken two pairs of liners too.  When my socks got damp I had to just wear no liners until they dried out.

The rock stars of the Pennine Way though, were undeniably the gaiters.  These were the difference between damp feet and soaking wet feet.  Sometimes your foot will sink into water higher than the top of your boot...it will catch you out...it's the Pennine Way!  A lot of the times this happened I was so quick in retrieving my foot, there was no water ingress at all.  On occasion though, I wasn't so lucky.  Thanks to the gaiters though...my feet never got soaking wet. 


I opted for some Rab Latok Alpine Gaiters and they are a breeze to get on and off, using Velcro rather than zippers.  I find them really comfortable too even in warm conditions.     

For icy conditions I took my Hillsound Trail Crampons which came in very handy...coming down Pen y Ghent in particular.


Rubbing my feet with Badger Balm every evening...I never got any blisters or hotspots....never have with these boots to be honest.  I got damn lucky with them and they more than held up to the challenge of the Pennine Way.


Sunday 1 April 2018

Shelter System


For hill and mountain trips I take my trusty MLD Trailstar. 

Camped out on Mozie Law


 This shelter was designed for wind and coped well with 40mph+ gusts up on Mozie Law.  For pegs I don't mess about....for each corner plus the door tie-out, I use MSR Blizzard stakes, and for the mid-point tie-outs MSR Groundhogs.
 
My Black Diamond Flicklock Alpine Carbon Cork walking poles give the Trailstar its structure, and I really must say....they do a superb job.  Adjusting each flicklock for optimal working tightness these poles do not slip....they just don't budge at all....time and time again.
 
I have a tennis ball cut in half too that I use.  One half goes over the top of the inside pole to spread the load on the silnylon to prevent any damage, and the other goes under the foot of the same pole to prevent it from sinking into the ground. 
 
With the stakes, poles and half tennis balls combined, I can really crank up the tension for strong winds.
 
With oodles of space inside, I really love this shelter, usually setting the height to 120cm.  The only downside of it is snow-loading during heavy snow.  Because of the shallow side profile, the snow would build up instead of slipping off....and snow can build up fast.  Thankfully, on this adventure, I didn't experience any really heavy snow whilst I slept.
 
Fully seam sealed all over, I have grown to trust my Trailstar...it is an outstanding piece of kit.


Green Slack, Hadrian's Wall